Can You Create Swatches with Color or Images Using EasyFlow?
EasyFlow offers two swatch option types for products: Color swatch and Image swatch. Using these option types, you can allow customers to select options from color or image swatches. In this documentation, we will show you how to create swatches with color or images in the app.
To create swatches with color or images, you need to follow a few easy steps. Follow these steps to get started:
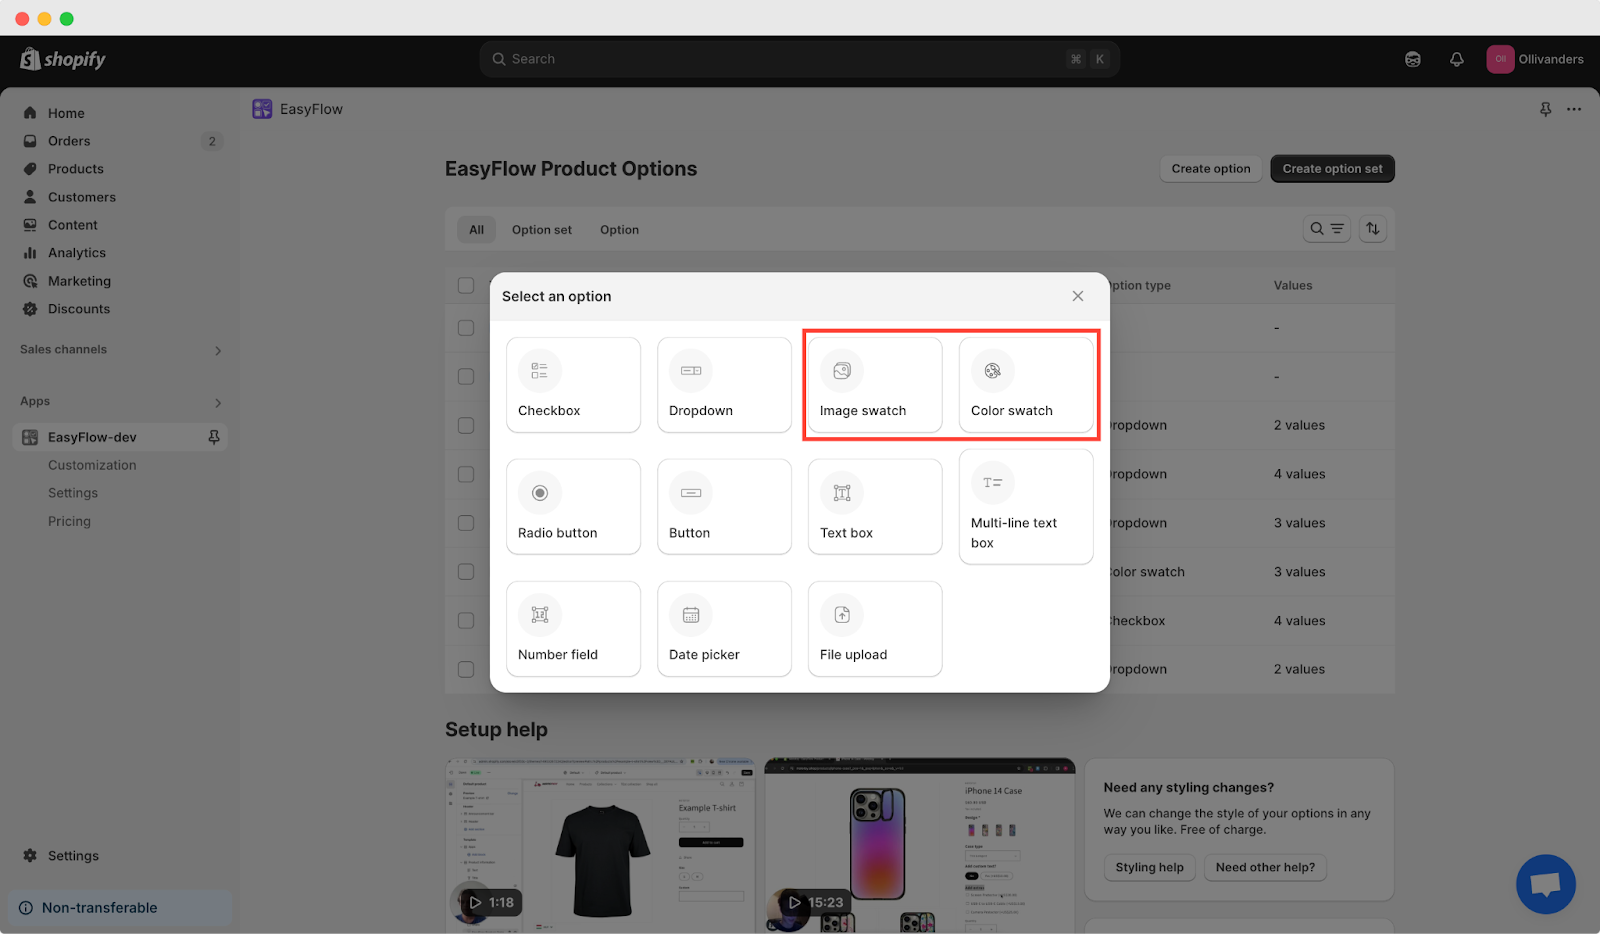
First, create a new swatch option by hitting the ‘**Create option**’ button in the EasyFlow dashboard. You have two different choices: Image swatch and Color swatch. So, pick your desired option type to proceed to the next step.
Now, you get to customize the newly created swatch option. Let us take a look at how to configure each swatch option type.
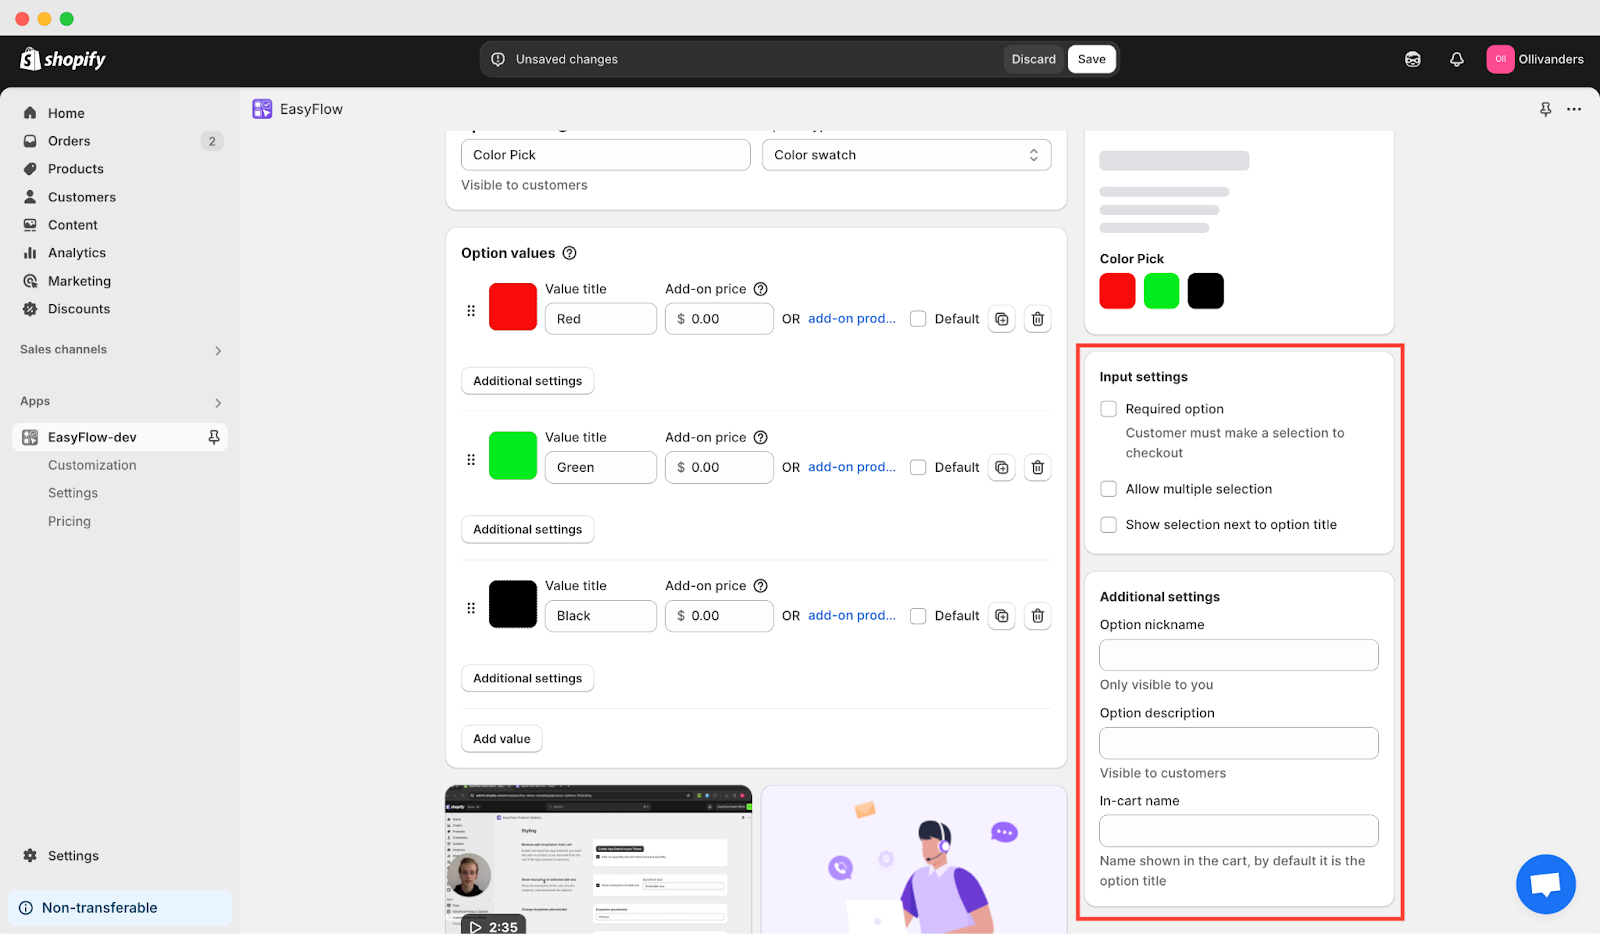
Enter an Option name. For each option value, you can input a Value title and set a color. Hit the ‘**Add value**’ button to create another option value.
Similar to the Color swatch, you have to input an Option name when you select Image swatch. For each option value, you get to enter a Value title and set an image via upload. To create another option value, hit the ‘**Add value**’ button.
Note: Check the ‘**Default**’ option if you want an option value to be preselected by default.
Next, you have some additional settings that are optional. On the right side, below the preview, you will find a dedicated ‘**Input settings**’ and ‘**Additional settings**’ section. In input settings, you can make an option required, allow multiple selections and show the selection next to the option title. The ‘**Required option**’ functionality makes the option mandatory for customers to select for checkout.
In the additional settings, you can set an option’s nickname and Option description (which will be visible to customers). Plus, you get to add an In-cart name, which is the name shown in the cart; by default, it is the option title.
To get additional settings for individual option values, click on the corresponding button for each value. Then, you can add a Value description and enable the ‘**Enlarge image on hover**’ option for image swatches.
Now, your customers can pick from the swatch option from the product page. As you can see in the image below, the selected color’s Value title is reflected during checkout:
This is how easily you can create price addons using the EasyFlow app. For further assistance, do not hesitate to reach out to **our support team**.
**How to Create Swatches with Color or Images?**
To create swatches with color or images, you need to follow a few easy steps. Follow these steps to get started:
**Step 1: Create a New Swatch Option**
First, create a new swatch option by hitting the ‘**Create option**’ button in the EasyFlow dashboard. You have two different choices: Image swatch and Color swatch. So, pick your desired option type to proceed to the next step.
**Step 2: Customize the Created Swatch Option**
Now, you get to customize the newly created swatch option. Let us take a look at how to configure each swatch option type.
**Color Swatch**
Enter an Option name. For each option value, you can input a Value title and set a color. Hit the ‘**Add value**’ button to create another option value.
**Image Swatch**
Similar to the Color swatch, you have to input an Option name when you select Image swatch. For each option value, you get to enter a Value title and set an image via upload. To create another option value, hit the ‘**Add value**’ button.
Note: Check the ‘**Default**’ option if you want an option value to be preselected by default.
**Step 3: Configure Additional Settings for Options and Values**
Next, you have some additional settings that are optional. On the right side, below the preview, you will find a dedicated ‘**Input settings**’ and ‘**Additional settings**’ section. In input settings, you can make an option required, allow multiple selections and show the selection next to the option title. The ‘**Required option**’ functionality makes the option mandatory for customers to select for checkout.
In the additional settings, you can set an option’s nickname and Option description (which will be visible to customers). Plus, you get to add an In-cart name, which is the name shown in the cart; by default, it is the option title.
To get additional settings for individual option values, click on the corresponding button for each value. Then, you can add a Value description and enable the ‘**Enlarge image on hover**’ option for image swatches.
Now, your customers can pick from the swatch option from the product page. As you can see in the image below, the selected color’s Value title is reflected during checkout:
This is how easily you can create price addons using the EasyFlow app. For further assistance, do not hesitate to reach out to **our support team**.
Updated on: 05/05/2025
Thank you!